Eight remarkable restorations
supported
by the National Lottery

1. Condition of the work
Before anything else can be done, the conservator has to know what condition the work is in.
Far from everything is visible to the naked eye, so the first step was to examine Saint Jerome with UV light and X-rays. This told conservator Eva van Zuien straight away that the work was covered with material from earlier restorations – overpaints and a thick layer of yellowed varnish.
Successive restorations had blurred Van Reymerswale’s original technique. The artist worked very precisely, using thin layers of paint and dramatic lighting, yet successive restorations and discoloured varnish had combined to rob the work of its depth and crispness. Some objects had lost their shape while wear and tear had revealed the ground layer in certain spots. What’s more, the three planks that form the support for the painting revealed cracks and traces of woodworm, as well as past attempts to deal with those issues. High time, then, for conservation!
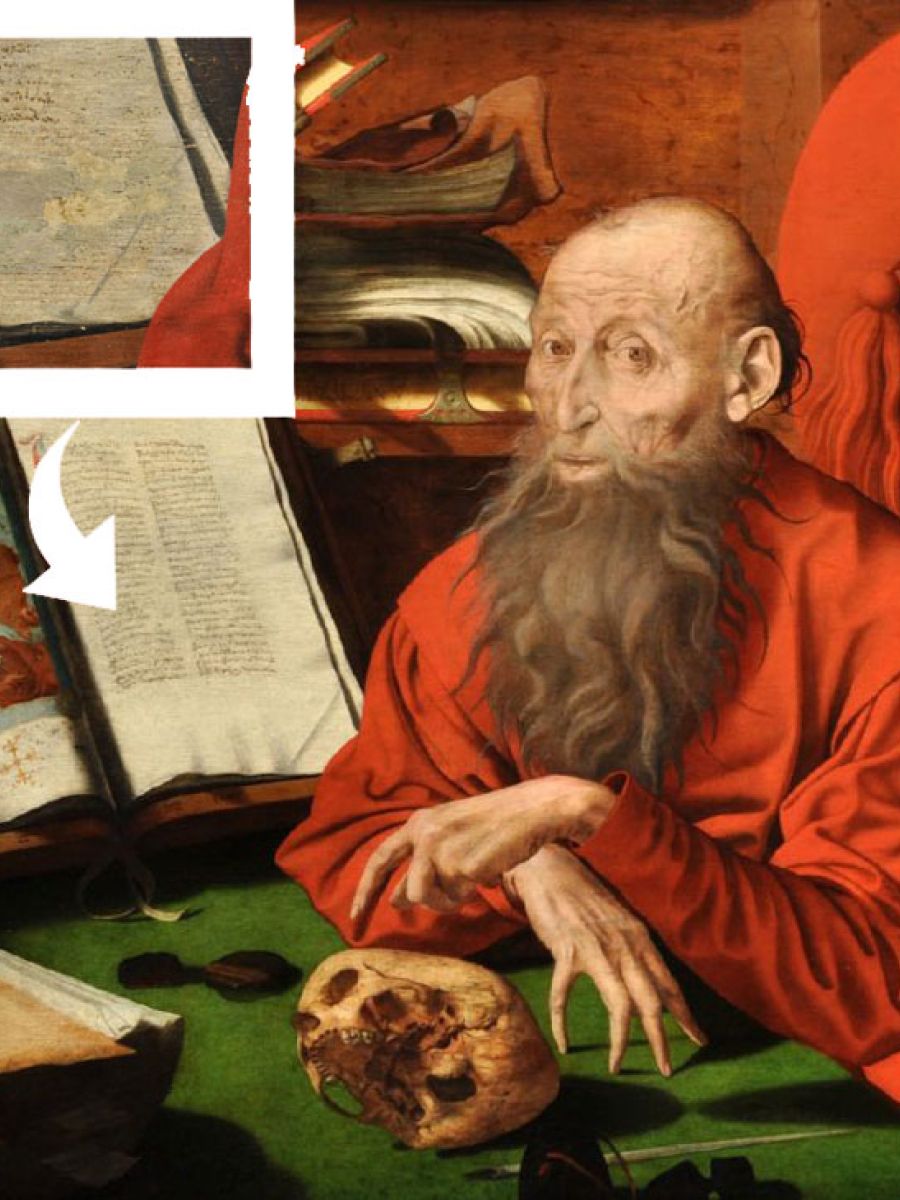
St Jerome - Marinus van Reymerswale - Conservation by: Eva van Zuien
2. Solubility testing
To get back to the work as originally intended by the artist, the conservator has to remove all the material that has been added over the years. Or at least attempt to do so: it’s far from easy, as the necessary solvents could potentially damage the original paint layer too.
In the case of some paintings, such as James Ensor’s Bourgeois Interior, this step is the biggest job. At some point, an uneven, blobby layer of varnish was applied to the painting, forming unsightly lumps – especially in places where the paint had been applied more thickly – attracting more dirt in turn.
Eva Verhaeven used cotton swabs to try out different solvent mixtures on the right edge of the painting, to test their effect on the varnish and paint. Examination under UV light confirmed the best results, enabling Eva to opt for a solution with different proportions of acetone and iso-octane. Other solvents had virtually no impact on the varnish.
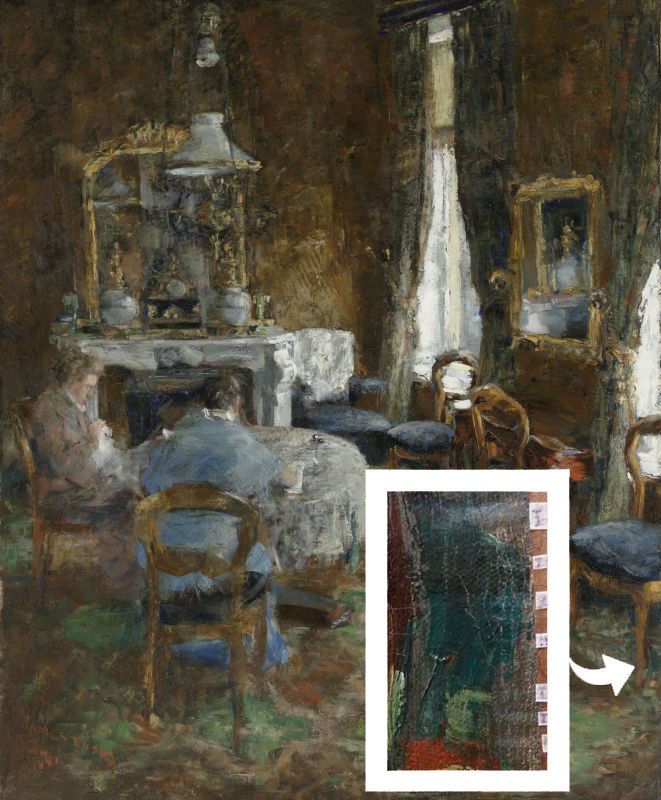
Bourgeois Interior - James Ensor - Conservation by: Eva Verhaeven
3. Cleaning and varnish removal
This step is by far the most intensive in the conservation process. Despite extensive preliminary testing, parts of the painting can still react in unexpected ways: perhaps more dirt has accumulated there or else the varnish is thicker. Cleaning and varnish removal are done literally millimetre by millimetre, using cotton swabs and customized magnifying glasses. With the greatest care, one tiny step after another, and with constant retesting.
In the case of The Vegetable Market, the varnish to be removed had actually been applied over the top of a thick layer of dirt. Conservator Eva van Zuien is hard at work right now removing that historical grime.
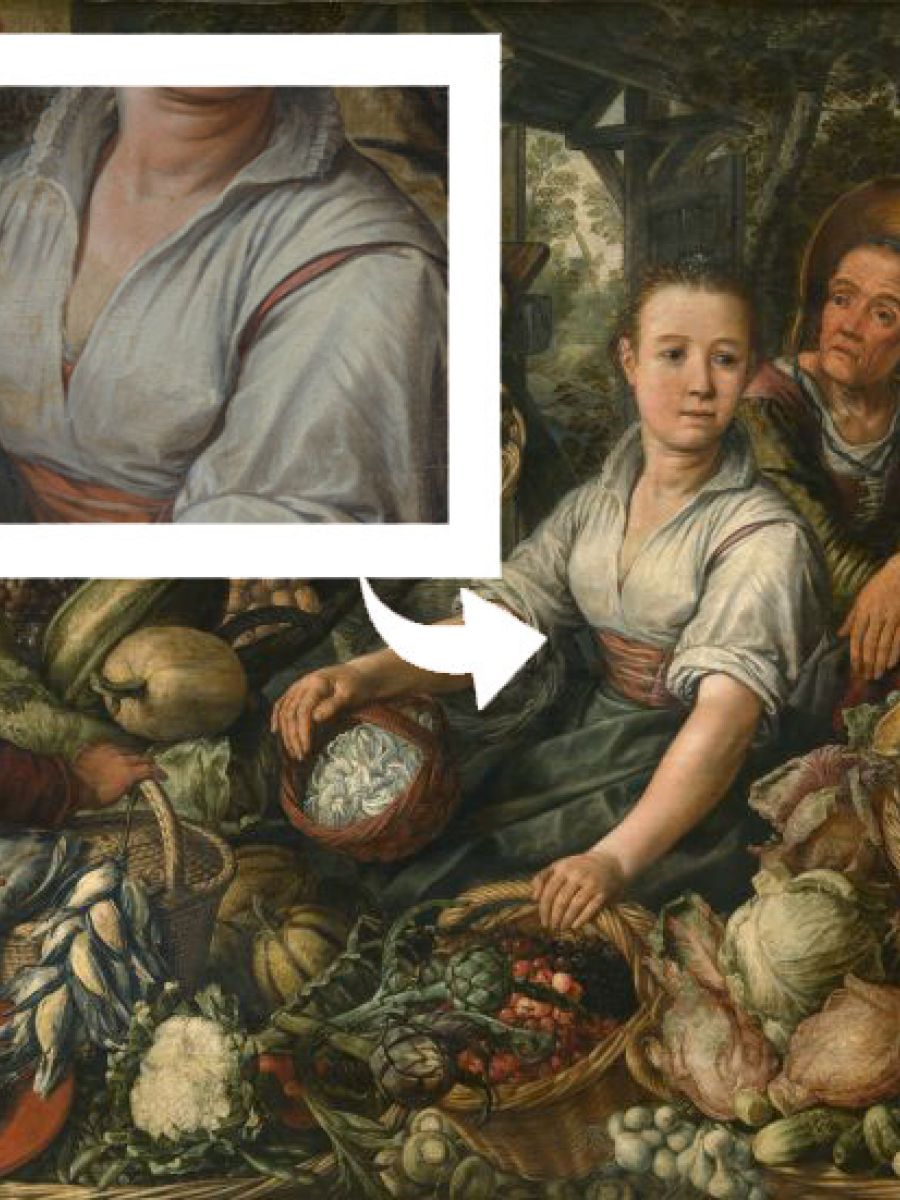
The Vegetable Market - Joachim Beuckelaer - Conservation by: Eva van Zuien
4. Removal of overpaints
Once the varnish has been removed, any overpaints stand out even more clearly. These were often intended as repairs, but past restorers occasionally thought they knew better than the artist and made ‘improvements’ – a rounder breast, for example. Whoever restored this huge scene took a pretty radical approach, even painting out an entire figure! For reasons unknown, a crippled beggar sheltering beneath the robe of the saint on the right was hidden away at some point in the 19th century. A variety of scans were used to uncover the figure virtually, and it was then up to conservator Celine Talon to do it for real! With great success, we might add.
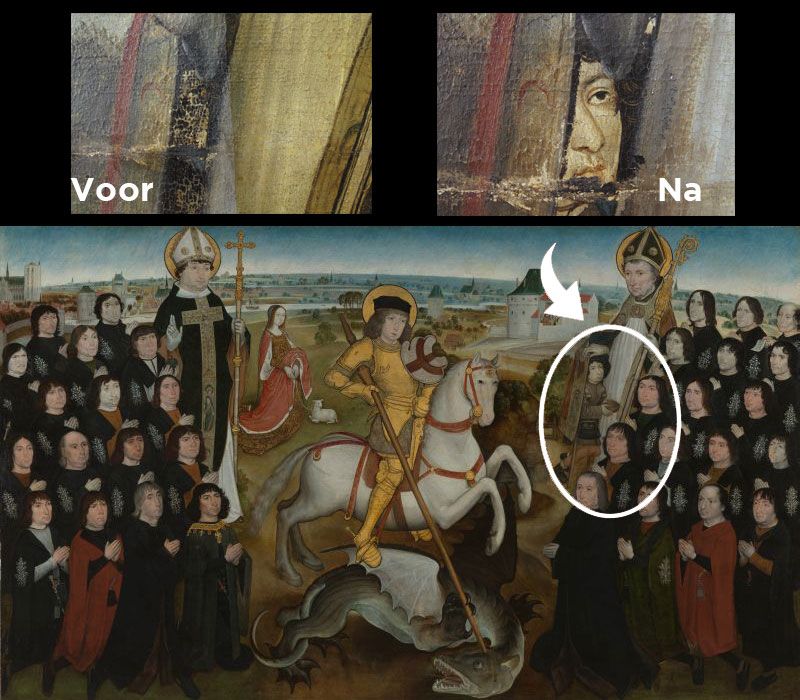
Members of the Guild of the Large Crossbow of Mechelen - Restoration by: Celine Talon
5. Consolidation of the paint layer
The advantage of oil paint is that you can work layer by layer: many shades of colour can be obtained by covering earlier layers or allowing them to show through. The disadvantage is that the composition of these layers is not always the same, potentially causing them to separate. This was just one of the problems that Jill and Ellen encountered in Ferdinand Bol’s painting. The original paint was in such poor condition, with age cracks, lifting and flaking, that the ground layer showed through in many places across the surface of the painting. Jill and Ellen had to deal with these complications before they could even start to fill and retouch the gaps. To smooth down the lifting, for instance, the sisters used a variety of techniques: silk and silicone paper, damp cotton swabs, heated spatulas, a hot-air blower and glue were all part of the toolkit for this precision work.
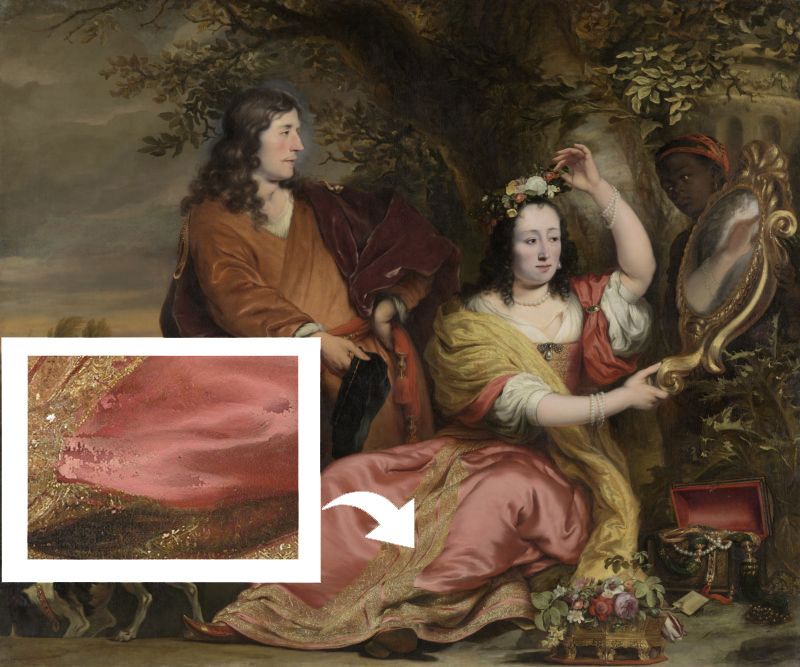
Jan van der Voort and His Sister Catharina - Ferdinand Bol - Conservation by: Jill and Ellen Keppens
6. Filling
Of all the eight paintings in the series, this portrait was in the poorest condition. There were losses across the whole of the paint layer – both small and large, shallow and deep. Not all of the gaps had been filled during previous treatments and what filling had occurred, was very crude. Conservator Claire Toussat had to remove all this before starting her own filling. The KMSKA’s conservation studio only works with materials that can be easily removed in the future. Claire opted in this case for calcium carbonate and a glue based on rabbit skin – materials that enabled her to mimic the texture of the original paint layer most effectively. Only then could she start to overpaint.
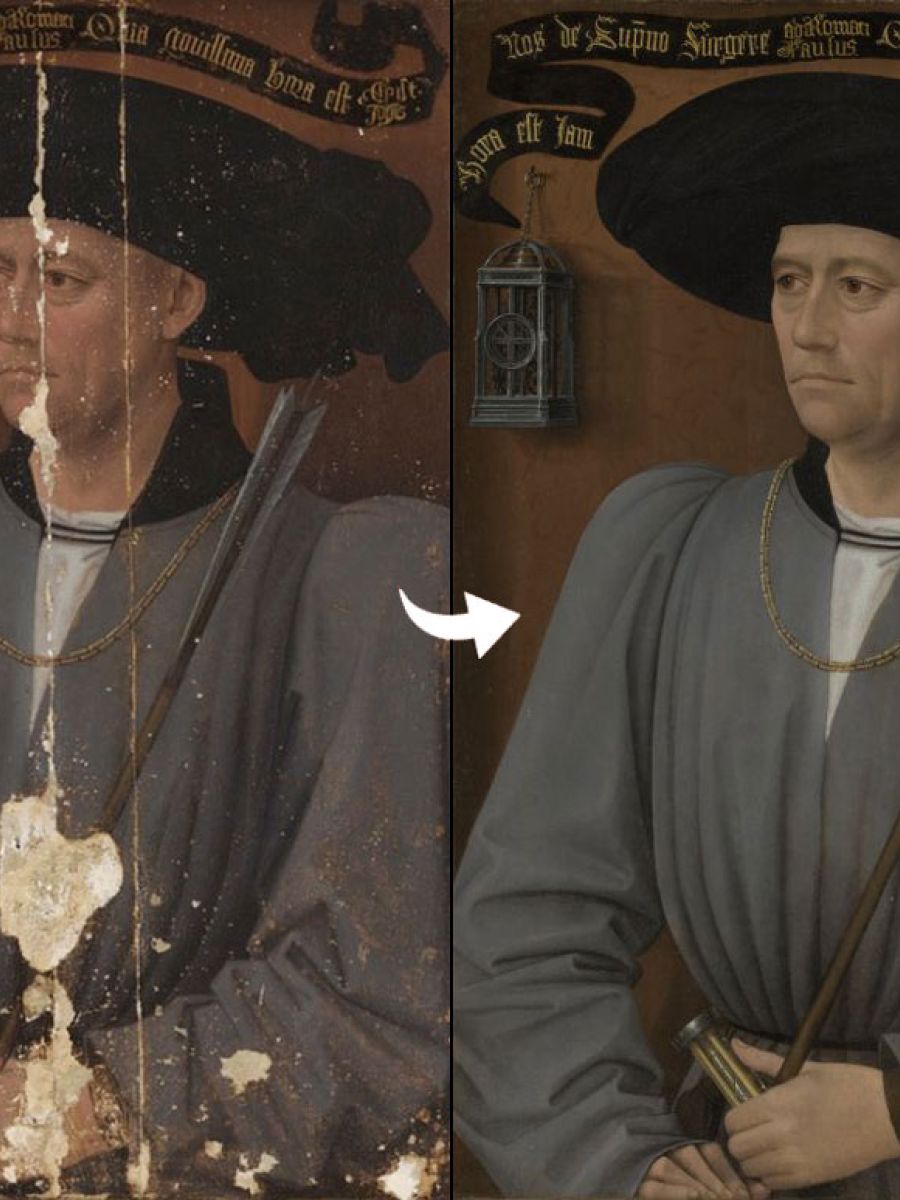
Portrait of an Umpire - attributed to Rogier van der Weyden - Conservation by: Claire Toussat
7. Retouching
Retouching is where the conservator fills in gaps with paint, possibly after preliminary filling. Here too, the conservation studio only uses products that can be readily removed in the future, whether ethanol-based with separate pigments or water-based using watercolour and gouache.
Parts of the background of the Adoration of the Shepherds were badly worn. Jantine worked with strokes of transparent paint – just as Jordaens himself did – following the original brushstrokes as much as possible. After dealing with less conspicuous elements in the foreground, it was finally the turn of the hands and faces. Jantine first laid down an undertone and then built up the colour in thin layers.
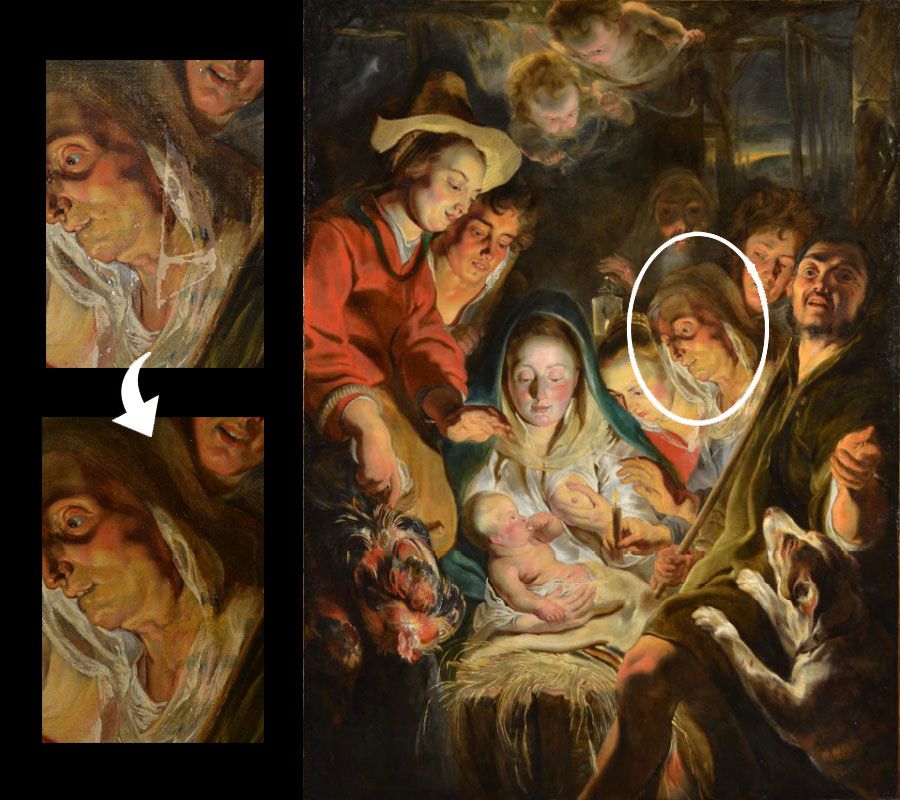
Adoration of the Shepherds - Jacob Jordaens - Conservation by: Jantine Maessen-den Brok
8. Varnishing
The final step is to apply a finishing layer of varnish, which is often sprayed onto the painting. Claire opted to use two layers of varnish for the Egg Seller to visually unify the treated surface and to protect the retouches. Both layers consisted of diluted dammar varnish, with the first layer also containing a small percentage of a special wax to give the surface a slightly more matt and uniform appearance. The final layer is very thin – the finishing touch after months of work.
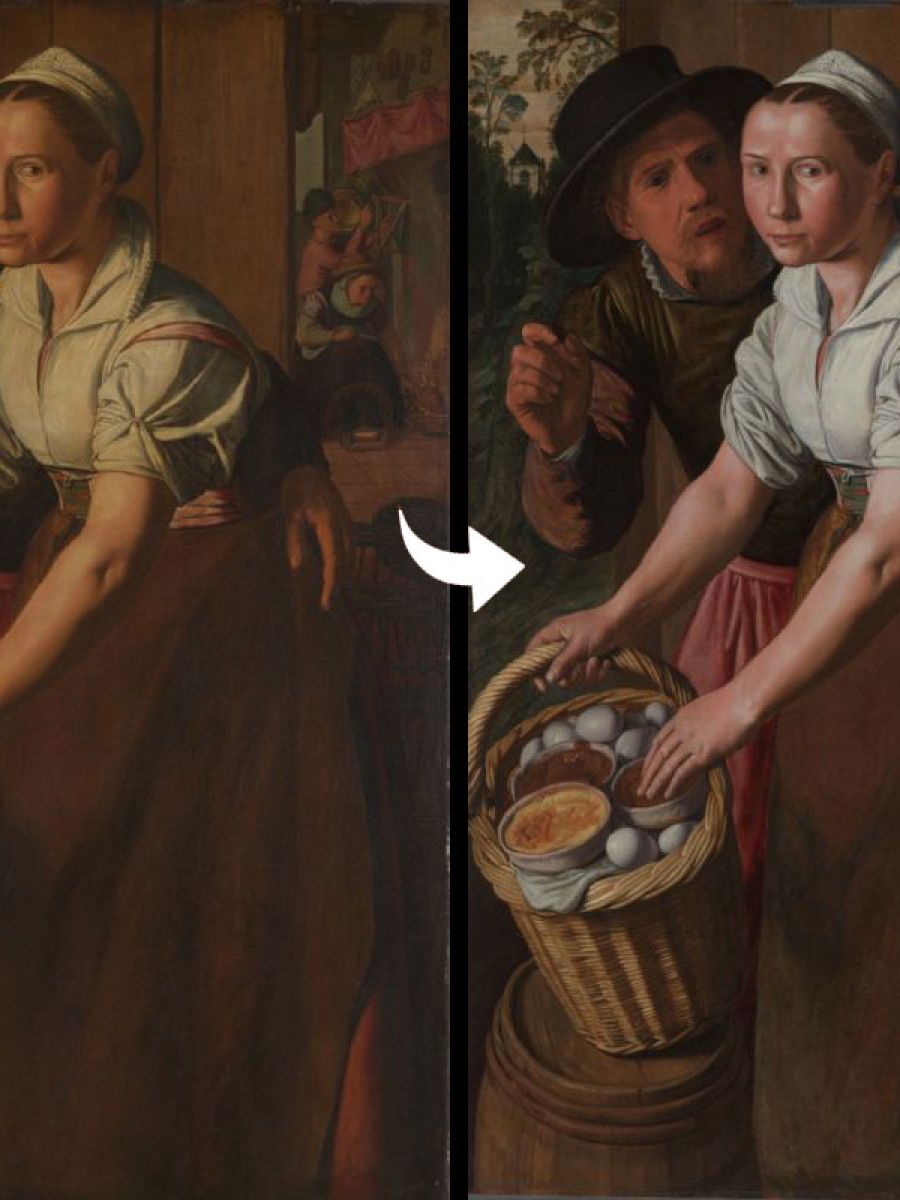
Egg Seller - Pieter Aertsen - Conservation by: Claire Toussat
These restorations were possible thanks to the Natioanl Lottery players.